Sunday 19 December 2021

Kaleido Foiling and Die Cutting Machine

This is not intended as a review of the Kaleido machine from Crafts Too but as I've had one for a few months I've decided it's time to post about how I'm getting on with it.

I still have (and use) my GoPress & Foil and I often use both machines in creating cards.


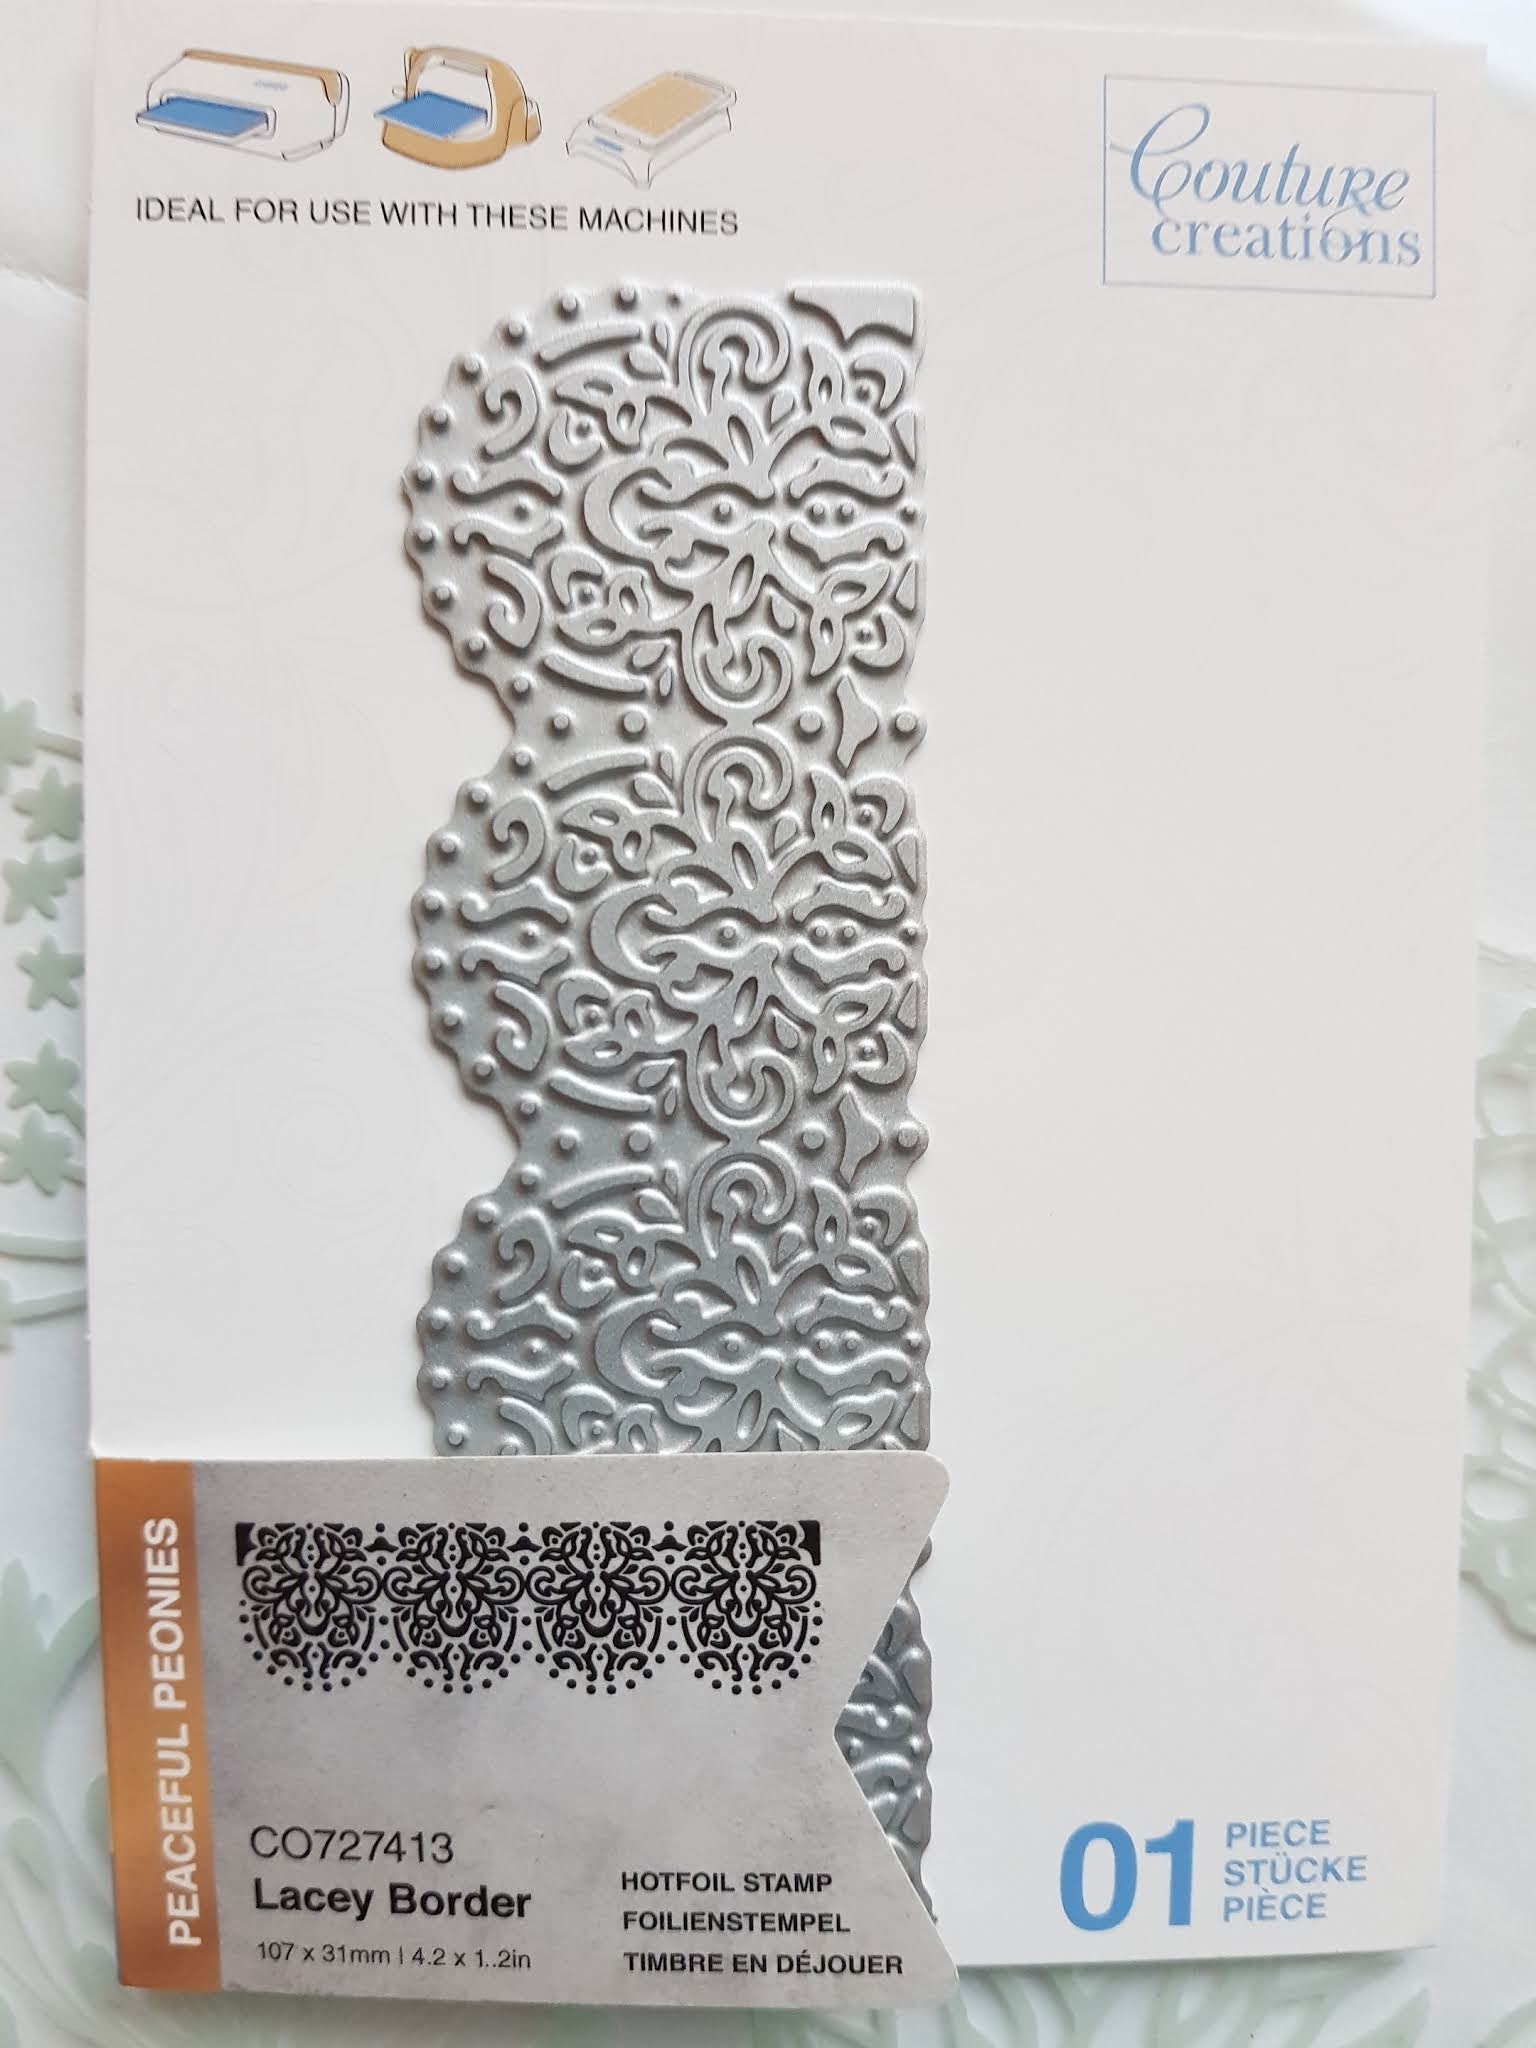
The Kaleido machine has been designed to make it easy to create foiled images or text from normal stamps - either rubber of acrylic/photopolimer.  The machine is essentially a die cutting machine that has a heated roller.  It works with a special stamping and stencilling mediums which when covered with toner reactive foil and passed through the rollers (when hot) transfer the foil where the medium has been used. The Kaleido can also be used to apply toner reactive foil to items printed on a laser printer (or photocopier) instead of using a laminator type machine such as a Minc foiling machine.


The mediums used for stamping and stencilling are easy to clean up and the kaleido stamping ink is applied to stamps as you would normal stamping ink.  Ink comes in a bottle used to re-ink the pad as the ink dries out quite quickly even when the lid is put on the ink pad.  The stencil medium is thicker and dries with a raised surface - similar to a gel medium or stencil paste but the "ink" can also be used with stencils applied with a sponge applicator or ink blending brush.

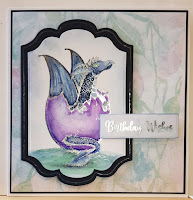
I've always used some ink stamping in my card making - mostly to create backgrounds, but I'm now looking at stamps in a whole new way and using some that I've had for years but never used.  

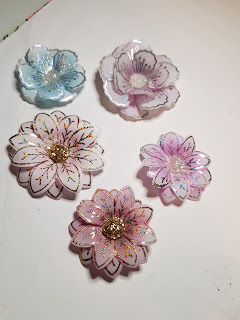
I'm also finding that stamps that go with coordinating die sets have lots of possibilities - these flowers for example, are made using Dreamees stamp and die sets.  I've stamped onto vellum with the Kaleido ink and then foiled before cutting out.


There are some limitations as to the types of card/paper you can use.  Many metallic, pearl and coated (shiny) card has a treatment on the surface that reacts with the foil - so foil is transferred everywhere the foil is, not just to the stamped or laser printed image.   I have a colour laser printer that I print backgrounds and toppers with, and I can't use the Kaleido to add foiling to those.

The Kaleido is also a die cutting machine - but if you are using it for die cutting it is best to have a separate set of plates to use when foiling so that they remain smooth and flat.

If you've read this far then your probably wondering what this machine looks like and how it's used - so here's the first video I've made using my Kaleido machine to create a foiled card.


This is the card made in the video


Saturday 27 March 2021

Blooming Friendship - Framed Sentiment Card

 Blooming Friendship - Framed Sentiment Card


With this blog post I'm saying farewell to the Couture Creations Design Team.  Being a member of the team has been a great experience - I've had the opportunity to try out wonderful products and work with beautiful paper collections. 

For this card I've used a combination of older Couture Creations products along with elements from the Blooming Friendship 12 x 12 papers.

My card is 5" x 7".  I've cut a piece from the patterned paper (sheet 5) 4 3/4" x 6 3/4" to leave a white border when it is stuck down on the card blank.  I've inked around the edges, using brown pigment ink to make is stand out.

The sentiment frame is from another of the 12 x 12 papers (sheet 6).  I drew around my die before cutting the piece needed from the 12 x 12 sheet as the panel is the same size as the die, and printed at a slight angle - take care to leave a border so you can line the die up with the printed design.

I cut the middle out of my foil to avoid getting any foil on the centre of the frame.  I've foiled the frame using rose gold foil and the sentiment using deep red foil.


The rose and leaves are made using Cut & Create dies - these can be used either with pigment inks or to hot foil using the GoPress & Foil.  For the rose I've used rose gold statin card and deep red foil, and for the leaves I've used white card and rose gold foil.


Couture Creations Products


CO726468 - Cut, Foil and Emboss dies - Modern Essentials  - Decorative Nesting Treasured Frames
CO727633 - Cur and Create Dies - My Secret Love - Get Well Soon (3pc)  (Rose and Leaves)
CO727630 - Cut and Create Dies - My Secret Love - Reaching Fern
CO726567 - Hotfoil Stamp - Butterfly Garden - Live, Love, Laugh


Saturday 13 March 2021

Blooming Friendship Cup Cake Card

 Blooming Friendship Cup Cake Card


This is a quick card made using papers and a die from Couture Creations Blooming Friendship collection.  

My card is 5" x 7" and I've just used a piece of one of the 12" x 12" sheets and inked around the edge to make it stand out from the card base.  The sentiment is die cut from the sentiment sheet - I've added a foiled border using my GoPress & Foil, but you could mat/layer with some red mirror card instead.


The cup cakes are die cut in white card.  I've then stuck the die cuts down on some satin rose gold card, and trimmed around them.  I've then added some ink on the part that would be the cup cake case.


Couture Creations Products


Saturday 27 February 2021

Diamond Panel Coffee Break Card

 Diamond Panel Coffee Break Card


For this card I've started with a square card base 14.8cm square (cut down from an A5 card blank).  This is just a little smaller than a 6" square card blank.

The front of the card base is folded in half to create the flap that the diamond is attached to.  The diamond is really just a square mounted with its points on the fold line.

The decorative papers, stamp and die are from Couture Creations Blooming Friendship collection. I've also used some dark grey card and white card.

I've used the Floral Mosaic, stamped 4 times to create the impression of a mosaic tiled floor.  It's very important that the square panel does not measure more from corner to corner (across the middle) than the height of your card base.  For my card base (14.8cm square) I used a square of card 10.1cm square.

The panel is mounted on the card front, on the left side only, using foam pads. I've tucked some of the red flowers from the ephemera pack under the edges of the diamond and then added some of the blue flowers overlapping the panel.


In the centre of the diamond I've used the Coffee Break mini die (cut from  dark grey card), mounted on a die cut white circle, matted onto a a circle cut from some dark grey card.

The inside of the card is also decorated with the patterned papers and has a sentiment cut from on of the papers using a circle die, matted onto a circle cut from white card.


The diamond panel hides the sentiment when the card is closed.

In my video I show you how to  use repeat stamping on the diamond panel - you will need to use a stamping platform (Stamp Press) for this.


Couture Creations Products


  OR 

CO727381 - Precision Stamp Press


Saturday 13 February 2021

Blooming Friendship Cards

 Blooming Friendship Cards


For these cards I've used the beautiful papers from Couture Creations Blooming Friendship collection. 

The backgrounds for both cards are made from one of the 12"x12" sheets, and I've also used sentiments from the sentiment panel 12"x12" sheet and the ephemera pack.


This card is made from the bottom half of the 12x12 sheet.  The bottom left corner is used for the main background and the reverse side of the bottom right corner is used as the backing layer - to create the red border.  My card base is 14.8cm square (cut down to a square from an A5 card blank) so I've cut the red layer to 14.4cm square and the piece for the main background to 14cm square.  

I've added some foiling to the background paper using the crackle die - I show you how to do this in my video.


Before sticking the layers down, gut the middle from the red piece using either a square die or a paper trimmer (the type with blades that slide in a groove).  The cut out piece is used to make the label the die cut is mounted on, and to make flowers for the other card.

I've used the Coffee Break die cut, and mounted it on a label cut from the red side of the paper.  For the label I've used one of the Modern Essentials  Cut, Foil and Emboss die sets - Nesting Inset Ovals, but you could use a plain oval die. 

The sentiment is from the ephemera pack.   I've added some ink around the edges to make it stand out from the background - I've used Card Deco Pearlescent Pigment Ink in Brown.


The second card is made using the top half of the 12"x12" sheet, with a sentiment cut from the sentiment sheet.  I've trimmed it out and then used another of the Modern Essential Cut, Foil and Emboss die sets (Bracket Frames) to die cut and foil it.


Cut the floral piece for the left hand side first  - approximately 5cm wide.  Leave trimming this piece to length until after it is stuck in place.

Turn the paper over to the red side and cut a piece to 14.3cm square (so there will be a small border of your card blank showing)

Line the floral strip up at the left hand edge of the red paper.  I've added a lacy die cut tucked under the edge of the floral strip, but you could use some actual lace.


Stick these in place lined up with the left hand edge, and then turn the assembled piece over and trim off the excess of the lace and floral panel at the back using scissors.

Once the background has been stuck down on the card base, add the sentiment panel and flowers.


The red flowers are die cut from the red side of any odd pieces of the paper and then I've added some Christmas Red Card Deco Pearlescent Pigment Ink which gives them a lovely sheen.  For the blue flowers I've used some pale blue paper and shaded with Navy Blue Card Deco Pearlescent Pigment Ink.  I show you how to shade the flower petals in my video.  
I've added some veining to the petals using a white gel pen.


In my video I show you how to foil using the crackle die, use the inks to shade the edges of sentiments and flowers, and how to put the cards together.


Couture Creations Products:

or


Saturday 30 January 2021

Foiled Christmas Crackers


You'll need to either use my Cracker Template or a Cracker die if you have one.

Download the template for the size card you have.  You can then print onto thick paper.  For the crackers, thick paper works better than card.  The paper you print on will eventually be covered by patterned card  or paper.  

A4 Cracker Template

US Letter Cracker Template

You will also need 5 paper clips to help hold things in place while card is shaped and glue dries.

I show you how to use the template, foil panels and assemble the cracker in my video.  The instructions below will probably make more sense if you watch the video first. 


Fold the printed template along the middle of the diamonds and then cut the grey diamonds out of the card.  


With the paper folded along the bases of the grey triangles, cut the grey triangles out, cutting through both layers of the paper.

At the ends of each row of triangles cut in from the edges of the paper - this creates the overlap for gluing the cracker together.

If you are printing on A4 paper you will have some extra card at the right hand end - trim at this end so that the overall length is 11 inches  This should give you 1 3/4" between the tips of the diamonds and the ends of the cracker - check that both ends are the same. 

Next score lines along the tips of the diamonds you have cut out, and fold so that the back along these lines.  This gives you the base for your cracker.   It needs to be decorated before the edges are stuck together.  For now just bring the edges together and hold them in place with paper clips so that the paper gets used to being curved - it will make the final assembly easier - see the video.

Cut pieces of coloured card or decorative papers to fit the edges and middle sections of the cracker.  As printers vary, and you might be using a cracker die, it's best you check how wide these need to be on your cracker.  If you are foiling these pieces then foil all of them before starting to stick them onto the cracker base - see video.

I've found it best to stick one of the short edges of each peace to the cracker base with double sided tape and use wet paper craft glue on other areas, leaving the other short edge, to about 1/2" from the edge, without glue.  With the glue still wet curve the ends of the cracker together and smooth down the decorative paper. - Once the glue has grabbed add glue to the other end of the piece on both inside faces of the cracker base and the decorative paper. Slide the end stuck with double sided tape between the cracker base and the decorative paper and hold in place until the glue has grabbed.   You can use paper clips on the cracker ends until the glue dries.

Here are some of the foil stamps I mention in my video - they are just suggestions for decorating the panels.


I can't tell you where you can buy any of the products.


Monday 18 January 2021

Cool Blue Layered Zinnias

Cool Blue Layered Zinnias


Couture Creations Cut and Create dies can be used with either pigment inks or foil.  For this card I've used the Layered Zinnia Cut and Create die set with Card Deco Pearl pigment ink - Navy Blue.

The soft blue oval in the background is also created using the Card Deco Navy Blue Pearl pigment ink and a Couture Creations ink blending brush - I show you how to do this in my video (link at bottom of page)


 My card is 5"x7" and I've used navy blue card as a mat layer.  I've cut the mat layer to 4 13/16" x 6 13/16" and the piece for the card front to 4 3/4" x 6 3/4".

Cut 2 pieces of white card the to the size for your finished card front. 

Use a die to cut an oval in the centre of one of the pieces of white card to use as a mask - tape the die cut piece in front of the other piece - I used masking tape to make a hinge at one side.

Load your blending brush with ink and gently apply ink around the inside of the oval, leaving the centre white.  You can lift the top piece of card from time to time to check how much ink has been applied - its hard to tell how much ink you've laid down until you lift the front piece of card.

I've used Card Deco Grey dye ink to stamp some leaves and flowers that will be in the background, and added a sentiment in black ink.


Now you just need to apply ink to the dies, cover them with card and run them through your die cutting machine.  I've used the same ink on all of the flowers but for some I applied more of the ink (see my video)


Couture Creations Products 


Friday 8 January 2021

Layered Camelia - Vintage Frame Card

 Layered Camelia

Vintage Frame Card


The papers I've used to make this card are left over papers from the Merry Little Christmas set and the dies used are a mixture of old and new.   

The flower is from the new Vintage Flowers collection - the Layered Camelia.

The frame is the Nesting Chandelier Frames - from an older collection.  
I've foiled this onto a wood effect paper from the Merry Little Christmas set.  When using the cut, foil and emboss dies with papers rather than card I add an extra shim of card on top of the paper to push the paper into all the detail foiled areas.  The extra shim doesn't go to waste as after foiling I glue the 2 layers together to give the extra stiffness - so that I can mount the frame on foam pads without it sagging.  I've used Chocolate Copper foil for the frame.


I foiled my sentiment in the Persimmon Orange foil, and then cut/foiled using the inner part of the frame set.  I trim the middle out of the foil using a craft knife so I can see where to position the die and foil over the sentiment.


The Layered Camelia flower is foiled onto black card, which makes the Persimmon Orange foil really pop.
The die set has 2 parts for the flower petals, but I've added an extra layer.


I've added shape to the petals using a ball tool so my flower has lots of depth.


I've used Red Copper foil in the leaves so they are a lighter shade than the flower.


Couture Creations Products Used

CO727728  - Cut and Create die set - Vintage Flowers - Layered Camelia
CO727630 - Cut and Create Die - My Secret Love - Reaching Fern
CO726464 - Cut, Foil and Emboss Die - Modern Essentials - Nesting Chandelier Frames (3pc)