Thursday 29 August 2019

New Driver Card

New Driver Card


I had this idea to make a card for someone who has just passed their driving test.

The sentiment and car are Couture Creation cut, foil and emboss dies, but the garage is made from some simple die cuts, with details added using the Couture Creations Mini Scoring Board.

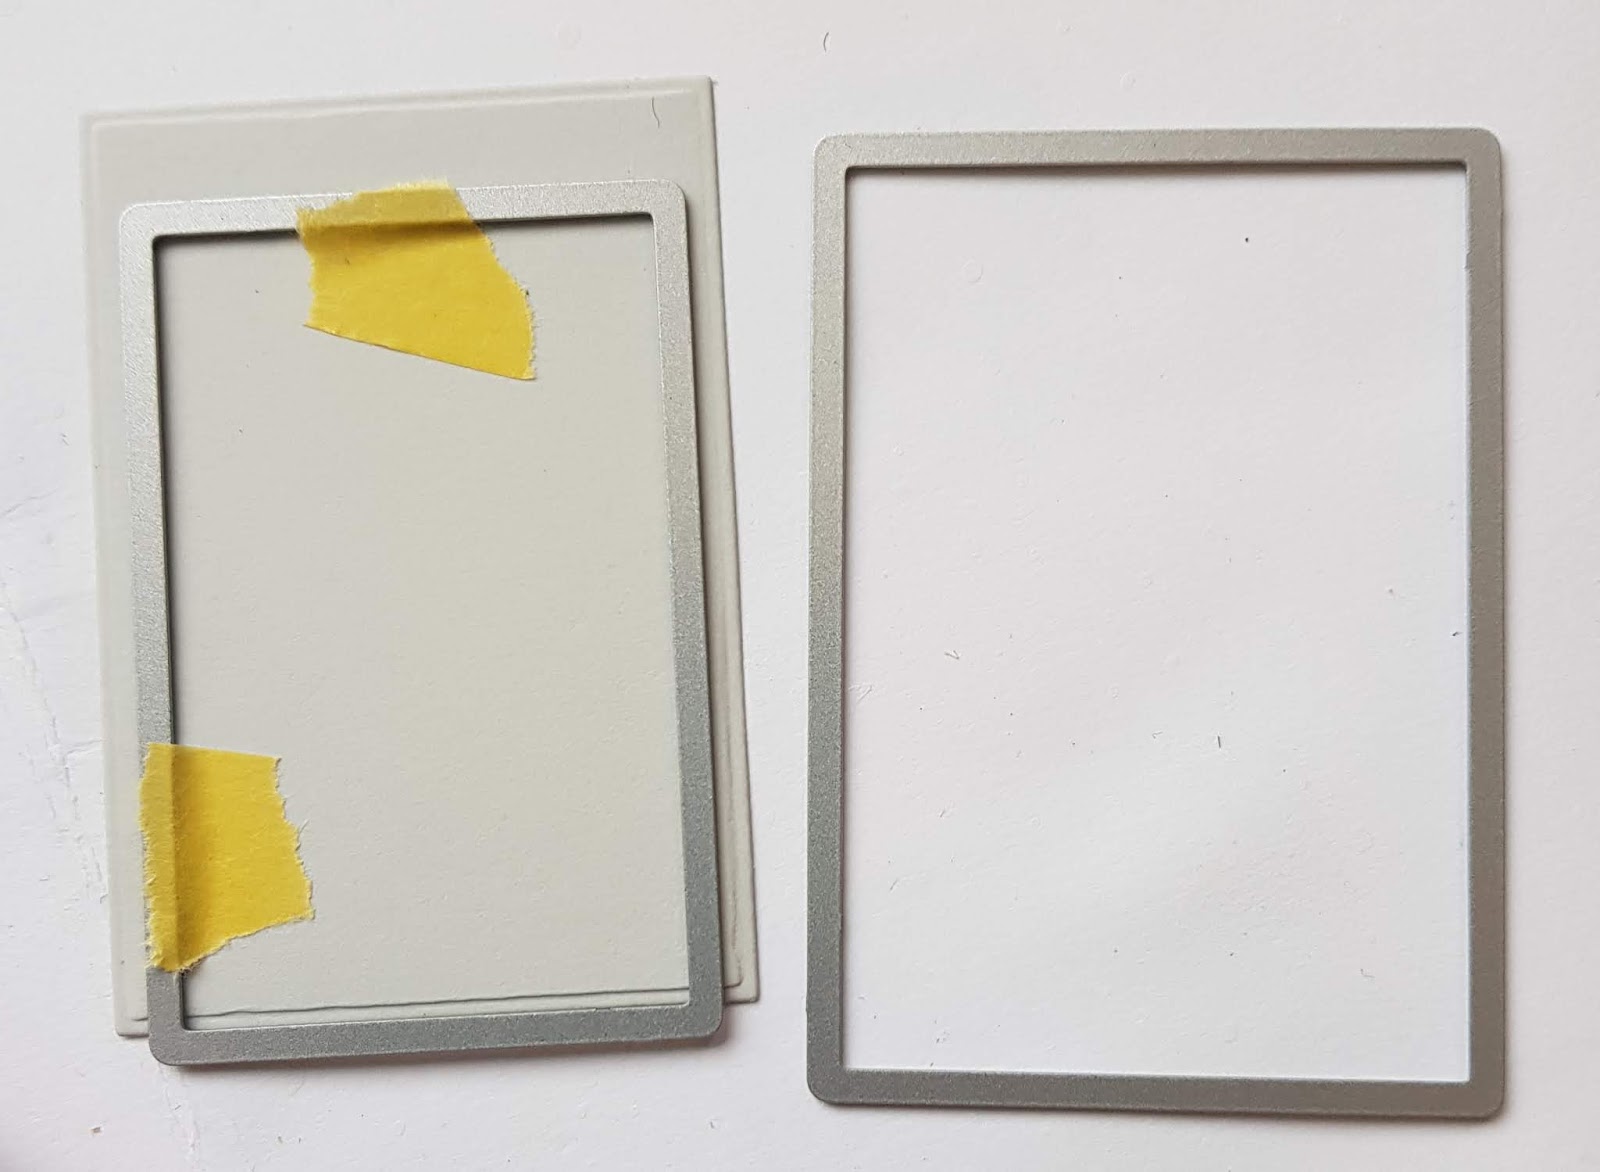
I've used some nesting rectangle dies to create my garage.  To begin with cut out the largest rectangle twice - one in the colour for the walls and the other in the colour for the door - I've used some red foil card for my door. Use the Next size down rectangle die to cut the space for the door.


Use a die to cut the shape for the roof.  You can cut this from the waste piece.


I used my Couture Creations Mini Scoring Board to add embossed details to the door and also to the roof, before sticking the elements of the garage together.   


I used high tack double sided tape to stick my "door frame" over the piece of card for the door.


Then add the triangle for the roof - only put glue on the part that over laps.  


Trim off the corners sticking out behind the roof, and trim the bottom of the garage if it's a bit tall - it will depend on the shape of the rectangle dies you've used.


For the car, I used the Jalopy cut, foil and emboss die.  I used a piece of white card as an extra shim on top of the die when I foiled mine.  The windows didn't cut out, so I coloured these in grey and stuck the two layers together so that my windows are filled in.  You can use this die with ink instead of foiling, and cut in your die cutting machine  like a normal die.


For the road, I used a wedge of card.  I've added some texture using an embossing folder. 

Decide where this needs to sit on the background layer of card, stick in place overlapping the edges of the back ground and then trim from the back using scissors.

The "Nailed It!" sentiment is foiled using another cut, foil and emboss die - I show you how to work with this die in my video.  


Couture Creations Products Used:

CO726935 - Delightful Sentiments - Nailed It! Cut, Foil and Emboss die
CO726752 - Mini Scoring Board
CO726064 - Foil (Heat Activated) - Drift Wood (Mirror Finish)
CO72540  -  Nouveau - Jalopy Cut, Foil and Emboss Die


Tuesday 20 August 2019

Naughty Or Nice Christmas Greetings Card

Naughty Or Nice Christmas Greetings Card


The papers in the Couture Creations Naughty Or Nice collection work really well layered together.  I've used 3 of the papers along with some red foil card stock to create this card. I've also used a cream A5 card blank, which I've cut down to make a square 14.8cm x 14.8cm card.

These are the sheets I've used:


These are the sizes for each layer:
  • Card Blank - 14.8cm x 14.8cm
  • Holly Paper - 14.4cm x 14.4cm
  • Red Foil Card - 13.2cm x 13.2 cm
  • Gold Paper - 12.9cm x 12.9cm
  • Red Paper - 12.5cm x 12.5 cm


Before you stick the layers together, you need to foil the sentiment (using the Merry Christmas cut, foil and emboss die) in the centre of the Holly Paper, and die cut a circle approximately 10cm diameter from the centre of the gold paper.


Details of how to foil the sentiment are in my video.  

For the decoration behind the sentiment I used the Noel Frame cut in both dark green and red foil card.  

Start by sticking 4 dark green die cuts together as shown in the photo, and then cut and add the red foil die cuts.


The gap in the middle is covered up by the sentiment.


Add the die cut circle in the centre of the card before sticking your die cuts and sentiment in place on top of it using foam pads.  I also added some holly leaves from the ephemera pack.   Alternatively use some die cut holly leaves to decorate around the sentiment.


Couture Creations Products Used: 

CO726343 - Mini Guillotine Trimmer
CO726889 - Naughty Or Nice - Collection Pack 12x12 Papers + Stickers and Postcards
CO726906 - Naughty Or Nice - Noel Frame Set mini dies
CO726932 - Naughty Or Nice - Merry Christmas Cut, Foil, Emboss die
CO726903 - Naughty Or Nice - Die Cut Ephemera Set


Sunday 11 August 2019

Lake Cruise Scrapbook Page

Lake Cruise Scrapbook Page

I decided to make up this Scrapbook page using pictures from a family holiday in the Lake District (of the UK) a few years ago.


On the first day of the holiday we drove a short distance south of Lake Windermere to Haverthwaite Station to catch the steam train to Lakeside, then boarded a cruise boat to tour Lake Windermere. We cruised to the other end of the lake and disembarked at Ambleside to have lunch at the Wateredge Inn, then boarded another cruise boat to go back to Lakeside and took the steam train back to Haverthwaite Station.  A beautiful, relaxing day watching the scenery go past, with a delicious meal half way through the day.

I've used a 12x12 paper from the Gentlemans Emporium Collection Pack.  The design on the paper frames the layout on the right hand side, and I've used the Midday Corner Decorative Die in the bottom right and top left corners to frame the layout. I've also used the same die to create a decorative frame backing for my page heading.  The photos and page heading have mats cut from kraft card. 


As well as the 12x12 paper, I've also used one of the post cards from the Gentlemans Emporium Collection Pack, behind the top photo, and used elements from the Gentlemans Emporium Ephemera Pack on and around the photos. 


I've used the Gentlemans Corner die to cut embellishments to frame the corners of the bottom left photo, and to decorate the "Memories" tag from the ephemera pack.


I chose a dark grey pearl card stock for all of my die cuts and this works well with the tones in the papers and the photos.

Couture Creations Products Used

CO726813 - Gentlemans Emporium Collection Pack - Stickers, Postcards and Papers - 12 x 12in
CO726826 - Gentlemans Emporium - Die Cut Ephemera Set
CO726834 - Gentlemans Emporium - Gentlemans Corner Mini Die
CO725943  - Le Petit Jardin  - Midday Corner Decorative Die


Tuesday 6 August 2019

NOEL Christmas Card

NOEL Christmas Card


For this card I've used a backing paper, dies and a cut/foil/emboss die from the Couture Creations Naughty or Nice collection.  The hot foil stamp used to decorate the ribbon is from the Gentlemans Emporium collection.

I've made my card blank from a sheet of A4 300gsm white card - scored down the centre, folded and then trimmed to a 14.9cm square.  My gold mat later is a 14.cm square and the patterened paper is 14cm squre.  Alternatively use a 6" square card blank and cut the gold mat 5 3/4" square and patterned paper 5 1/2" sqaure.

I cut 4 of the Noel Frame mini die from my gold card before sticking the patterned paper over the top.


I also cut another 4 of the Noel Frames from white card - I used the card I trimmed off when I made my card blank.  The die cuts are layered together, along with some circles cut from some dark red card.


The NOEL letters are cut/foiled using Couture Creations Cut, Foil and Emboss Alphabet set, but you could use other die cut letters or stamp and heat emboss letters using gold embossing powder as alternatives.

I used some dark red ribbon, foiled in gold, to create a cross in the centre of my card.  I used a border hot foil stamp from the Gentlemans Emporium collection to foil the ribbon, but you can use almost any hot foil stamp.  There are some great border hot foil stamps in the Naughty or Nice collection too.

In my video I'll show you how to foil onto ribbon, and use the cut, foil and emboss dies - used for the letters and for the Christmas tree.

The gold backing card and the patterned paper are layered together before using double sided tape to secure the ribbon at the back.  I marked the centre point of each side to help me line up the ribbon correctly so the both pieces are straight and cross in the centre of the card.


Now you just need to stick these onto your card blank and then add the die cut Noel Frames with their letters in each corner.  I've raised all of the frames up on foam pads.  Add a small amount of glue under the centre of the ribbon cross, so that neither of the pieces can move.  The last thing to add is the Christmas tree in the centre.


Couture Creations Products Used

CO726425 - Cut, Foil and Emboss - Alphabet Set
CO726889 - Naughty Or Nice - Collection Pack 12x12 Papers + Stickers and Postcards
CO726927 - Naughty Or Nice - Curling Christmas Tree Cut, Foil and Emboss Die
CO726906 - Naughty Or Nice - Noel Frame Set mini dies
CO726848 - Gentlemans Emporium - Border Collection hot foil stamps