Wednesday 24 April 2019

Butterfly Garden - Hanging Plaque

Butterfly Garden - Hanging Plaque


This project is a hanging MDF plaque, featuring papers, dies and foiled elements from Couture Creations Butterfly Garden Collection.

Start by choosing a section of one of the 12x12 papers and cutting it a little larger than your MDF plaque.  To stick the paper to the plaque I use a PVA or "tacky" glue applied to both the MDF and the paper with a brayer (hard roller) - The brayer applies an even, thin coat of the glue quickly.  

Stick the paper over the MDF, and smooth out, and then leave it for the glue to dry completely, before using a sanding block to remove paper overhanging the edge of the MDF. (see my video)

I started by adding the panel with the inspirational words "Live Love Laugh".  I used Couture Creations black foam mounting pads to raise it off the surface of the plaque.  For this panel I've used another of the Butterfly Garden papers.  The words are foiled in a grey foil, and then I used one of the nesting Modern Essentials cut, foil and emboss dies to foil the edge in gold, and cut out the panel.


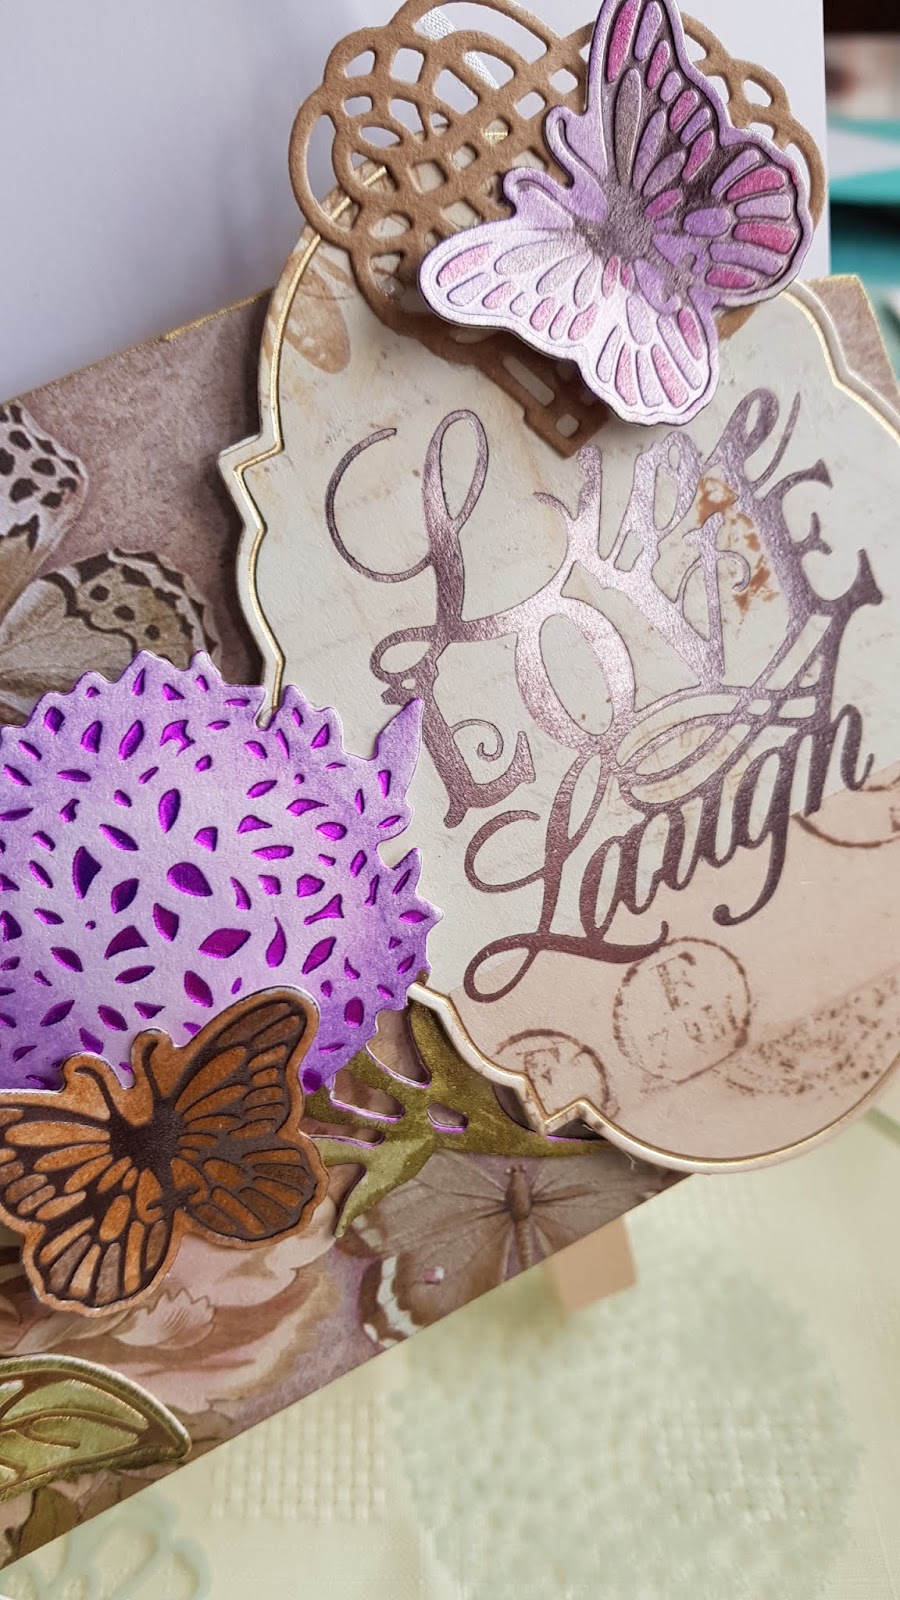
For the flowers and butterflies, I've foiled onto pearl card stock, and then coloured using water based brush pens.  My card lets me reactivate the colour with a water brush, but alternatively, you can scribble with the pens on a glass mat and then pick up the colour with a water brush to colour the foiled items.  I show you how I do this in my video.


As my pearl card is quite thin, I add an extra layer of plain card when foiling using the cut, foil and emboss dies.  This both gives me a deeper emboss for the foil, and also results in an extra die cut to match the foiled piece.  I stick the two layers together using a wet glue, and shape the foiled pieces while the glue is still wet, so they keep the shape once the glue has dried.


I use am acrylic gel medium to stick down anything that has been shaped or needs to be stuck down to an uneven surface, or overlapping die cut elements.  Pinflair gel glue or similar should work just as well.

My video shows me making the plaque from beginning to end, so it's quite long.  Feel free to skip forward through any bits you don't need to watch.


Couture Creations Products Used

CO726534 - Butterfly Garden - 12x12 Sheet 7
CO726530 - Butterfly Garden - 12x12 Sheet 3 
or
CO726526 - Butterfly Garden - 12x12 Paper Pad

CO726541 - Butterfly Garden - Woven Heart mini cutting die
CO726552 - Butterfly Garden - Beehive mini cutting die
CO726567 - Butterfly Garden - Live Love Laugh, hotfoil stamp
CO726569 - Butterfly Garden - Ruffled Peony cut, foil and emboss die.
CO726467 - Modern Essentials - Nesting Butterfly Frames (butterfly)
CO725900 - Lavish Ballroom - Hydrangea cut, foil and emboss die
CO726460 - Modern Essentials - Nesting Inset Oval Frames
CO726428 - Couture Creations Adhesive - 3D Foam - Black Dots


Saturday 13 April 2019

Butterfly Garden - Sentiment Panel

Butterfly Garden - Sentiment Panel


For this quick card I've used 2 of the patterned papers from Couture Creations Butterfly Garden 12x12 paper pad, along with some kraft card and some pearl ivory card.

For the panel I've chosen a paper that has a butterfly border and the darker purple patterned area, which I've cut a rectangle from, and mattered onto kraft card and then onto ivory card.

 I've foiled the sentiment onto pearl ivory card, and then die cut with a plain rectangular die.


I've used the butterfly cut, foil and emboss die from the Couture Creations Nesting Butterfly Frames cut from ivory card, and foiled in rose gold, the Hydrangea cut, foil and emboss die cut from pearl ivory card, and cut the Butterfly Garden Woven Heart from pearl ivory card.


Couture Creations Products Used

CO726526 - Butterfly Garden - 12 x 12 paper pad
CO726467 - Modern Essentials - Nesting Butterfly Frames cut, foil and emboss dies
CO726567 - Butterfly Garden - Live, Love, Laugh hot foil stamp
CO725900 - Lavish Ballroom - Hydrangea cut, foil and emboss die
CO726541 - Butterfly Garden - Woven Heart mini die


Thursday 11 April 2019

GoPress and Foil Beginners Guide - Part 3 - Foiled Edges and Frames

Now you've got the basics of using hot foil stamps with your GoPress and Foil machine its time to look at how you can create your own toppers with foiled edges. There are 2 ways to do this (using the GoPress and Foil) - you can use Couture Creations Cut, Foil, and Emboss dies, or you can use plain nesting dies (cutting dies), but it's great to use both together to create multi layered toppers. In the video I'm working from a kit I've had in my stash for a long time - so I'm not giving details of it - it probably isn't available now - its just to give you some ideas for how you can use whatever you have.


GoPress and Foil Beginners Guide - Part 2 - Positioning Foiling On Pre-C...

When you need to get your foiling in the right place first time, this is how to do it. In this video I look at using the Pre-cut toppers that come with card kits, and adding foiled sentiments and embellishments to them. In the video I'm using Hunkydory kits (with pre-foiled toppers) and a Hobbyhouse kit, but you can try this with whatever you have. You can also use this technique when you are going to use a die to turn your foiling into a topper or sentiment tag - so that you don't need to allow much extra card around your sentiment.


GoPress and Foil Beginners Guide - Part 1 - Foiling with hotfoil stamps ...

I've tried to cover all the things beginners ask about in this video - using various brands of hot foil stamps, using various brands of foil, using various card and paper. Plus using card shims, and over foiling. This is an update on my original "Back to Basics" video - I now have a better setup for making videos, and a new die cutting machine so you can see the GoPress & Foil hot plate being "rolled".


Friday 5 April 2019

Shadow Box Easel Card

Shadow Box Easel Card


Using the Couture Creations Scoring Board takes the hard work out of making the mini box frame for this easel card.

For the box frame you'll need to cut a sheet of card down to 8" x 10".   This will give you a finished box frame with outside dimensions of 4" x 6".   You'll also need to cut a piece of card to 4" x 11" to make the easel for the card.

I show you how to make the card from the scoring to decorating at the end in my video - which you'll find at the bottom of the post.

Once you've cut your card for the frame to size, you need to score lines 1/2" apart on all 4 sides - as shown in the picture.  Score the lines working in from the left hand edge, at 1/2", 1", 1 1/2" and 2" and then turn the card and repeat, until you have scored the lines on all 4 sides.


On 2 opposite sides also score short lines at 2 1/2" just up to where they meet the score line going across the card 1" down.  I like to score from the top down, then flip the card over, right to left, and score down from the top again.  Then turn the card over top to bottom, and repeat, so you have the same score lines on each end.


Once you've done all of the scoring, use the score lines to mark the cut lines shown above. Add a diagonal line joining the end of the short score lines (5) to where score line next to it (4) meets the 3rd score line crossing from the other direction.

At 1, cut up to the 3rd score line
At 2, cut up to the 4th score line
At 3, cut up to the 4th score line
At 4, cut up to the 4th score line
At 5, cut up to the 2nd score line and then across the diagonal line to meet the cut line made at 4.

When you have cut all 4 corners you should end up with this 


Trim the small flaps to taper slightly - this will make it easier when folding the sides of the shadow box into place.


Turn the card over so that the score lines appear raised and make valley folds along all of the score lines. Burnish all of the score lines with a bone folder or similar tool.


You might find it easier to add the backing paper for inside the frame at this stage, so that you can cut it a little over size and hide its edges under the sides of the shadow box.

Add high tack double sided tape along each of the sides, and fold in the sides to form the box - see my video for details.


To stick down the narrow ends, flatten out the sides, and then fold and stick in the same way.


For the easel stand, score the long 4" strip of card at 3" and 6".  Fold and burnish at the score lines, then open out the card again.  Add glue or double sided tape to the short end section (up to the first score line).   Line up the bottom of the box frame with the end of the strip of card, with the line scored at 3" underneath the middle of the frame, and stick in place.


Then you just need to decorate with patterned papers and die cuts.


Couture Creations Products Used

CO726342 - 12 x 12 Scoring Board
CO726526 - Butterfly Garden - 12 x 12 paper pad
CO725943  - Le Petit Jardin  - Midday Corner Decorative DieCO725935  - Le Petit Jardin  - Morning Daisy Mini Die
CO725937  - Le Petit Jardin  - Evening Branch Mini Die
CO726343 - Mini Guillotine Trimmer