This card has been created using a section of paper cut from this double sided 12x12 sheet - it uses a square section cut from the bottom, left corner. My card blank is 15cm square - I have added some ink around the edges before sticking my backing paper down.
Having cut out the square I've used a craft knife to cut around the wings of the butterfly, but not the body - so that the wings can be lifted.
I've also used a slightly larger section of the dark side of this paper as a mat layer behind the paper with the butterfly.
Once you have cut the 2 pieces of patterned paper to size, stick the darker paper down onto your card blank. Then use a craft knife to release the wings of the butterfly from the paper - it doesn't matter if you don't cut exactly on the line, but get as close as you can. As the wings will be lifted, you can trim any extra bits from the wings or the edge of the aperture and it won't be noticed. Having cut around the wings, I've added some ink around the edges of the wings, and the opening where the wings have been released, and also in random areas of the paper, to give it an even more distressed look. Before sticking the paper down onto the backing layer, add some foam pads to the back of the wings, as shown below. This will keep the wings slightly raised so that they don't become trapped in the opening.
Stick the foam pads to the wings but leave their backing in place so that they do not stick to the backing layer.
I've die cut a tag and stamped and heat embossed a sentiment from the Steampunk Dreams Sentiment Collection.
For this card I've used papers and dies from Couture Creations Steampunk Dreams Collection. The tags are a set that includes 3 sizes of tag dies and the key die. I've also used a strip hot foil stamp from the Gentlemans Emporium Collection and a sentiment cut, foil and emboss die from the Dazzlia Collection. I've also added some gold card and matching foil.
I've started by using the dark side of this paper as my base layer, and then added a layer of gold card leaving an 1/8" border of the dark paper showing.
The foiled strip also uses this paper.
The next layer uses the rust side of this double sided paper
The large tag is cut is cut from the side of the paper with the music pattern, and the smaller tag (cut using the middle size die in the set) is cut from the paper shown below.
I cut out one of the butterflies from this paper and added to the smaller of the tags.
To finish off the card, I've added a foiled sentiment and a die cut key - the key die is part of the tags die set.
In my video I show you how to put the layers together and how to create the foiled strip and the foiled sentiment.
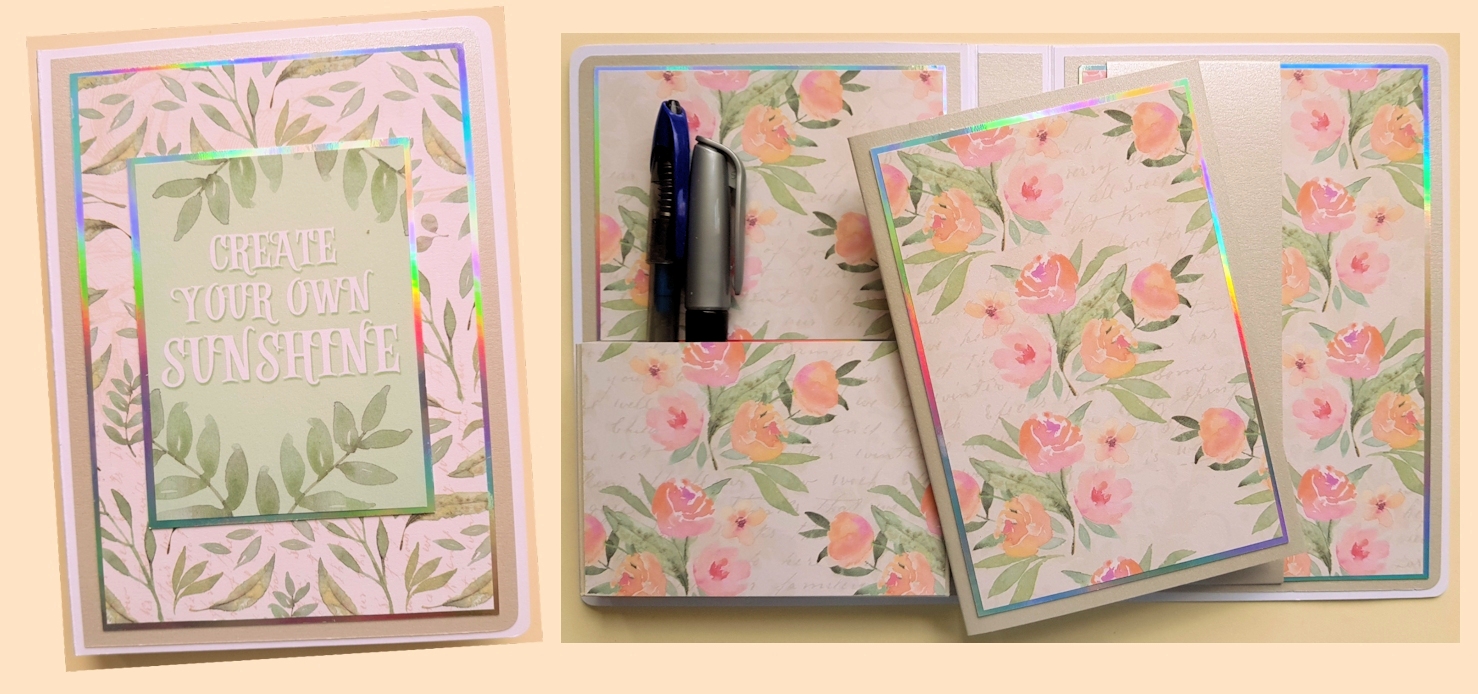
I love the warm pinks and muted greens in these papers from Couture Creations "My Secret Love" collection. I've used them to decorate a notebook holder, but this could be adapted to make an album or memory book - you might want to make the spine a little wider to accommodate the page attachments if you are making an album or memory book. The one I've made is 5" x 7" with 1" depth at the spine. Along with the beautiful papers I've use 300gsm white card (2 A4 sheets), some beige pearl card (3 A4 sheets) and some rainbow mirror card (2 A4 Sheets). The notebook I've used is A6 - 10.6cm x 15cm (European size), but there is room for a slightly larger notebook. You'll need to use 2 sheets of 12" x 12" patterned paper, including covering you notebook to match the holder. You may also want to snip out additional coordinating elements from your papers to add more decoration. I've use the Couture Creations Mini Guillotine, the Couture Creations Scoring Board, the Couture Creations Mini Score Board and a small corner rounding punch. I've used pva glue applied sparing with a fine tip nozzle to stick my layers together, except when sticking the papers down onto the mirror card, where I have used double sided tape. Please take a look at my video (link at bottom of page) to see which tools I've used and how I've used them. Cut one of the A4 sheets of white card down to 11" x 7" and score 5" in from each of the ends. Burnish the folds to create the base of the notebook holder. See my video for tips on doing this using a small scoring board.
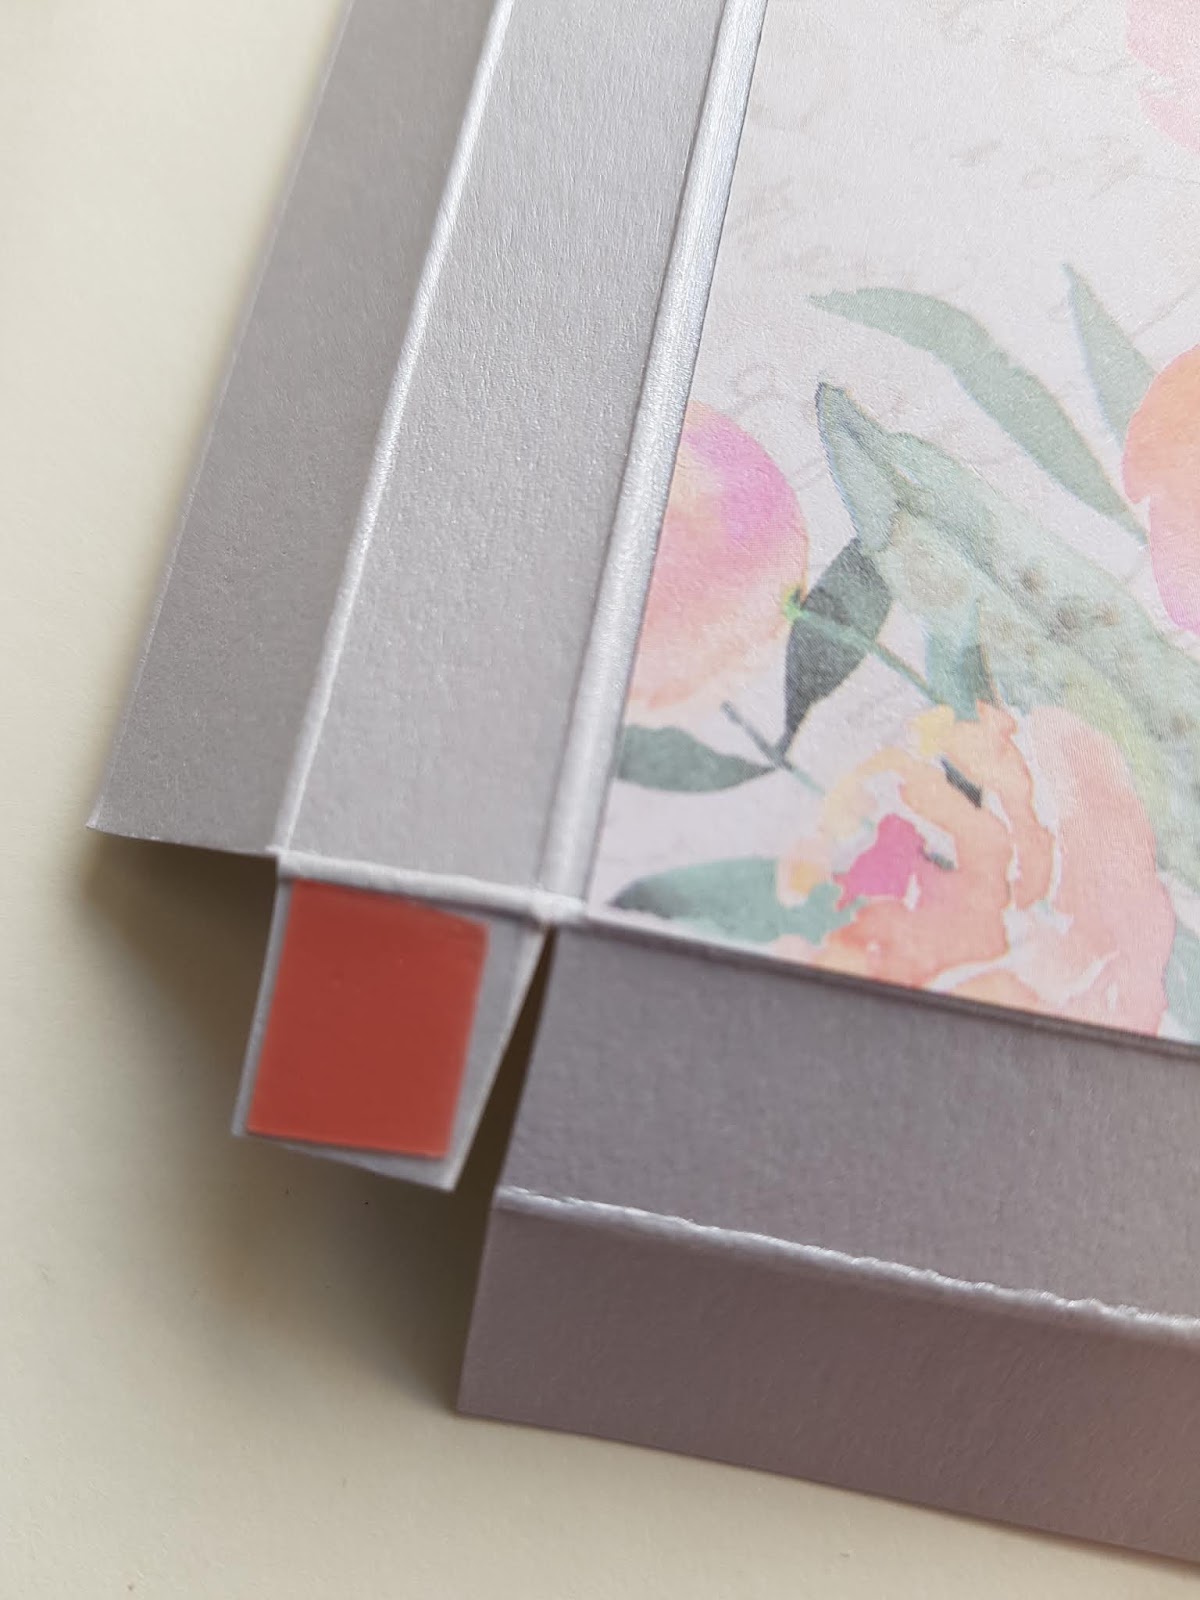
Next cut enforcing pieces from the other sheet of white card. The measurements for these are shown in the picture and they are slightly narrower than the spaces they will be stuck down in so that the fold lines are not covered. You will need 2 pieces 4 15/16" x 7" and a strip for the spine 7/8" wide, but slightly longer than 7" - it is easier to cut this piece to length after it is stuck in place
If you want to have rounded corners on your holder or album, use the corner rounding punch on the 4 corners of the base piece and on the matching 2 corners on each of the reinforcement pieces before gluing them together. Glue the reinforcement pieces down on the inside face of the cover, being careful not to cover the crease lines - as shown below. Trim the piece reinforcing the spine to length after you have stuck in down.
The next thing to do is to decorate the front cover - matting and layering with the patterned paper. It's easier to do this now, while you can open up the holder/album and work with it laying flat.
Next, add the base mat layers inside the holder. I've used the beige card for this.
Then cut to size the pieces needed to mat and layer the patterned paper with the mirror card and stick those together using double sided tape - but DO NOT stick them down inside the holder yet, as a strip needs to be added to hold the notebook in place.
Once the paper and mirror card are stuck together use them to score a 2" wide strip of card that will wrap around them. Cut the strip to be 8" or 21cm (for A4 card) long as you'll need approximately 1/2" at either end of the strip to fold behind this layer and stick it in place
Wrap the strip around the layer length ways about 1/2" from the left hand edge and stick in place with double sided tape - I've used high tack tape.
Then stick this layer down on the base layer inside the holder, on the right hand side.
For the left hand side, where there is a pen holder, you also need to prepare the layers of patterned paper and mirror card, but DO NOT stick them together. Cut them to size and check that they would layer together - but the paper is going to be cut so that the bottom portion will cover the pen holder, and the top portion will be stuck down onto the mirror card. For the pen holder, cut a strip of card 4 1/2" wide and 2" wider than your patterned paper - this will be approximately 6 1/2" wide - but do check how wide your patterned paper is. I've used some of the beige card for this. Score at 1/2" and 1" at one end of the card and then use the patterned paper to mark out the width of the pen holder and make a score line. Then make 2 further score lines 1/2" apart. Trim the card off at the furthest score line.
You also need to make score lines on one of the long edges at 1/2" and 1" from the edge - or in from the other edge.
Burnish all of the scored lines, and then cut away the card at the corners as shown. I've cut a small "v" down the sides of the small flap that folds in to hold the sides in place.
Now cut the patterned paper into 2 pieces - make sure the bottom section is just the right size for the pen holder. Instead of measuring you might want to stick the whole piece in place, glued to the front of the pen holder and then trim off along the top edge.
Stick the top half of the paper down on the mirror card. If you want to add some elastic across the top half to help hold pens in place do this now, before sticking the mirror card down onto the inside of the front cover.
Add some double sided tape to the two flaps and fold the sides and bottom in and secure in place
Score a length of card at 1/2" spacing and fold and stick as shown - I've left a long section for a ruler or highlighter pen. These partitions are strong enough to stop pens falling over, but can still be flexible enough to accommodate pens that are a little larger than 1/2".
Now you can fold in the bottom and side flaps and add double sided tape.
Now the pen holder can be stuck in place, inside the front cover.
I've also decorated my notebook to match with some more mirror card and patterned paper.
Here's my video showing how I've used some of the tools and giving you a look at my finished notebook holder.