Wednesday, 20 March 2019

Butterfly Garden - Bracket Frames Foiled Panels

Butterfly Garden - Bracket Frames Foiled Panels


This card is made from just one 12x12 sheet of the beautiful Butterfly Garden papers, and 1 A4 sheet of black card, plus the A5 card blank, and a little ivory card stock, for the butterfly and honeycomb die cuts.

Here's how I selected the area of the 12x12 paper to use for the background.


The panels are then made from sections cut from the bottom part of the paper.  The area in the top right is left over, but I used some it in my video to show how to foil the panels.


The black panels for the mats and the panels made from the patterned are foiled separately, and when foiling the patterned papers I lay an extra pieces of card on the back of the patterned paper to protect the paper from being cut into by the raised foiling lines on the dies. The extra layer is not needed when foiling card.  

See my video for details of how to foil the panels using the GoPress and Foil, with the Couture Creations Bracket Frames Cut, Foil and Emboss die set


The large, centre panel is raised up on foam pads so that is appears to float over the top of the two smaller ones.


Couture Creations Products Used:

ULT157552 - Ooh La La - Framed Butterfly Flourish die set
CO726459  - Modern Essentials Cut, Foil and Emboss dies - Bracket Frames 
CO726526 - Butterfly Garden - 12 x 12 paper pad
CO726532  - Butterfly Garden - Double Sided Sheet 5 
CO726552 - Butterfly Garden - Beehive mini die
CO725385 - Foil - Gold (Mirror Finish) - Heat activated

In the video you also see me using:
CO726343 - Mini Guillotine Trimmer

Tuesday, 5 March 2019

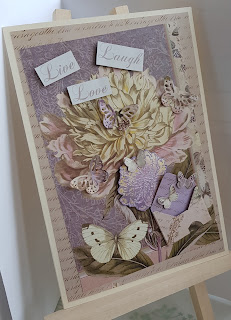
Butterfly Escape

Butterfly Escape


I've created this card with butterflies escaping from a miniature envelope in the bottom corner.   The papers used are from Couture Creations Butterfly Garden collection. 


I made the miniature envelope using the Couture Creations Scoring Board, which has a great attachment for scoring the across the diagonal lines needed on envelopes.  The envelope is made from a piece of paper 2 1/2 inches square.


 You have to position the envelope making guide so that the paper being scored can extend past it.


The place you actually score is 3/8" away from the 0 on the diagonal ruler, 
so you need to take that into account if you are calculating where to line up your paper.  


For the side flaps, line the corner of the paper up with the 3/4" mark on the diagonal ruler


Make sure the paper is butted up against the guide, but doesn't slide under it, and doesn't move when you are scoring.


Score the opposite sides at the 3/4 mark, turning the paper 1/2 turn for each one, and then line the other edges up with the 1 1/8" mark and score for the top and bottom flaps.


Where the score lines cross, cut the corner out, as shown here

 
To finish off, fold in the side flaps and fold the bottom up, then trip the tip of the point off the bottom flap where it meets the side ones.  I've also rounded the corner of the tip of the top flap.

I've also added a flower using the Peony Flower Mini Stamp. 

I stamped using purple pigment ink, and heat embossed with some pearl embossing powder, before coloring with mica water colors.

Couture Creations Products Used

CO726537  - Butterfly Garden - Sheet 10
CO726536  - Butterfly Garden - Sheet 9
12x12 papers  or CO726526 - Butterfly Garden - 12 x 12 paper pad
CO726554 - Butterfly Garden - Peony Flower Mini Stamp 
CO726342 - 12 x 12 Scoring Board


Sunday, 3 March 2019

Pretty Peonies - Layered Toppers with Foiled Edges

For these cards I've used the Crafters Companion Gemini, Pretty Peonies Foil Stamp, along with my GoPress and Foil to create the toppers with one layer just foiled and a smaller layer with the designed coloured in.


The first card I made was on navy blue card, and to color it I used some mica powders that can be mixed with water to make a paint.  I keep some in a paint pallet, that have been mixed with water previously, and then left to dry out.  They are easily reactivated by just adding a little water with a brush.  I show you these and how to use them in the Part 2 video.

I've used the same techniques for the foiling on both cards, but used different layering dies.  The foiled edge on each of the panels is created by using the back of the cutting die as a hot foil stamp, and then cutting the panel out with the same die.   You need a thin metal shim (mine is a Tonic Media die cutting shim) to place on your GoPress & Foil, and the card is placed on top that.  The die is heated through the card, and must be cutting edge up.  It will leave scratch marks on the lid of the GoPress, just like the Cut, Foil and Emboss dies do.

NOTE: The Couture Creations "Conversion Plate" is too thick, and should not be used for this technique.

The second card - which you see me foiling in the video, I used some water color pencils, and on the black card I prefer the effect these give more than the mica water colors.

Colored using
mica water colors
colored using
Derwent Lakeland water color pencils

Video - Pretty Peonies part 1 - The foiling.


Video - Pretty Peonies part 2 - The coloring